We have a very awkard corner at the base of our stairs. When we moved in I thought it practically begged for a small round table and pretty lamp but it wasn't long before I realized that a better use of the space would be to put a tall hutch in place.
Normally I'm the queen of Craigslist for these sorts of things but every time I found a piece that wasn't super hideous the dimensions were all wrong. I needed something that was no wider than 30" and no deeper than about 12".
I started to look online but there was no middle ground for quality/price between a particle board hutch from Target that looked really cheap and a similar-looking (but better quality) hutch from Restoration Hardware for $2,000. Seriously?!
Frustrated, I started watching YouTube videos on DIY furniture building and came to realize that with a circular saw and drill jig, you can build nearly anything. I started drawing up plans based on what I saw on Target's website:
I really like Shaker style furniture because of its clean, simple, and classic lines. It's functional and stylish without being fussy. That pretty much sums up my approach to everything I purchase to furnish my home with. Once I had most of my materials assembled (and more tools), I spent many an evening on my deck cutting and drilling the boards. Some days were so hot/humid I had to bring the party indoors.
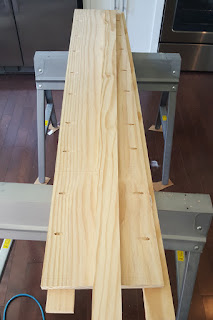
Then it was a matter of pulling everything together. Hans helped a lot for this part. All of that pine started to get really heavy.
Assembled
It fits!
To make things even harder on myself I decided to make inset doors.
Sanding
I'm really really proud of these doors.
I don't have a table or miter saw so it took some time to figure out that I needed a jig if I was going to accomplish uniform-size stiles and rails. I had to perform some router wizardry in order to inlay plywood in the center. Also, you have to be really careful with dimensions when you are building inset doors. Too large, and they'll stick to or scrape the frame. Too small and you'll have a ridiculous gap. I did a lot of research for this and found that most carpenters prefer a 3/32" gap to allow for seasonal wood expansion. Like I said, it took a lot of fiddling and hair-tearing.
I found some cheap tongue-and-groove boards that I think are used for wainscoting. I wish the quality of the wood hadn't been so poor but since it was just used for the back of the piece for looks and not structure it worked out.
Go to antique consignment stores and you'll find an abundance of pastel chippy painted furniture everywhere. I've been interested in buying a table here and there but the prices that people charge for refinished furniture is more than I'm willing to pay. Since I was going for an old-is-new look with this build I thought it would be the perfect opportunity to play with milk paint and a wax finish. Keeping to my neutral palette, I purchased a light linen color for all of the surfaces except the backing, which I kept bare. Then I went back with some sandpaper and roughed up some of the edges to give it a lived-in feel. I thought the painting/finishing part was going to be super fun but to be honest applying the wax finish sucked. The effect is exactly what I wanted, however, and I couldn't be happier.
There was a little bit of drama with finding appropriate hinges for the doors. I do not recommend purchasing hardware on Amazon. If you have to buy online like I did, opt for an actual woodcraft vendor because if you have any questions you can call them up and make sure you're purchasing exactly what you need.
I found some cool leather pulls on Etsy, which are perfect for a tight corner where the one of the doors will hit the wall often.
I would estimate it was at least 40 build hours and another five for finishing and hanging the doors. And the great thing is it's SOLID wood and didn't cost a fortune's worth of materials. I definitely have a new appreciation for why hand-made furniture can be so expensive.
The completed project


